Importing the BRM Material Library in LightBurn
BRM maintains an extensive material library with tested cutting and engraving parameters for our CO₂ laser machines. The library is free to use and works directly inside LightBurn. This guide walks you through downloading, importing, and applying it to your projects.
What you need
Section titled “What you need”- LightBurn installed on your computer
- A BRM laser machine, or knowledge of your laser source wattage (100 W, 150 W, 300 W)
- About 5 minutes
Step 1: Download the library
Section titled “Step 1: Download the library”Download the library as a single .zip archive:
Download the BRM Material Library
Extract the .zip file. You will get a folder called Libraries containing three subfolders, one per supported language:
EN— EnglishDE— German (Deutsch)NL— Dutch (Nederlands)
Inside each language folder, the files follow this naming pattern: BRM_[wattage]_[language].clb
For example, the English library for a 150 W laser source is: Libraries/EN/BRM_150_EN.clb
Pick the file that matches your laser source wattage and preferred language.
Step 2: Open the Library panel in LightBurn
Section titled “Step 2: Open the Library panel in LightBurn”- In LightBurn, open the top menu and click Window.
- Click Library.
The Material Library panel opens in the sidebar.
Step 3: Load the library file
Section titled “Step 3: Load the library file”- At the bottom of the Library panel, click Manage Library.
- In the menu that appears, click Load library.
- Browse to the
.clbfile you picked in Step 1 and click Open.
The library now appears in the Material Library panel, ready to use.
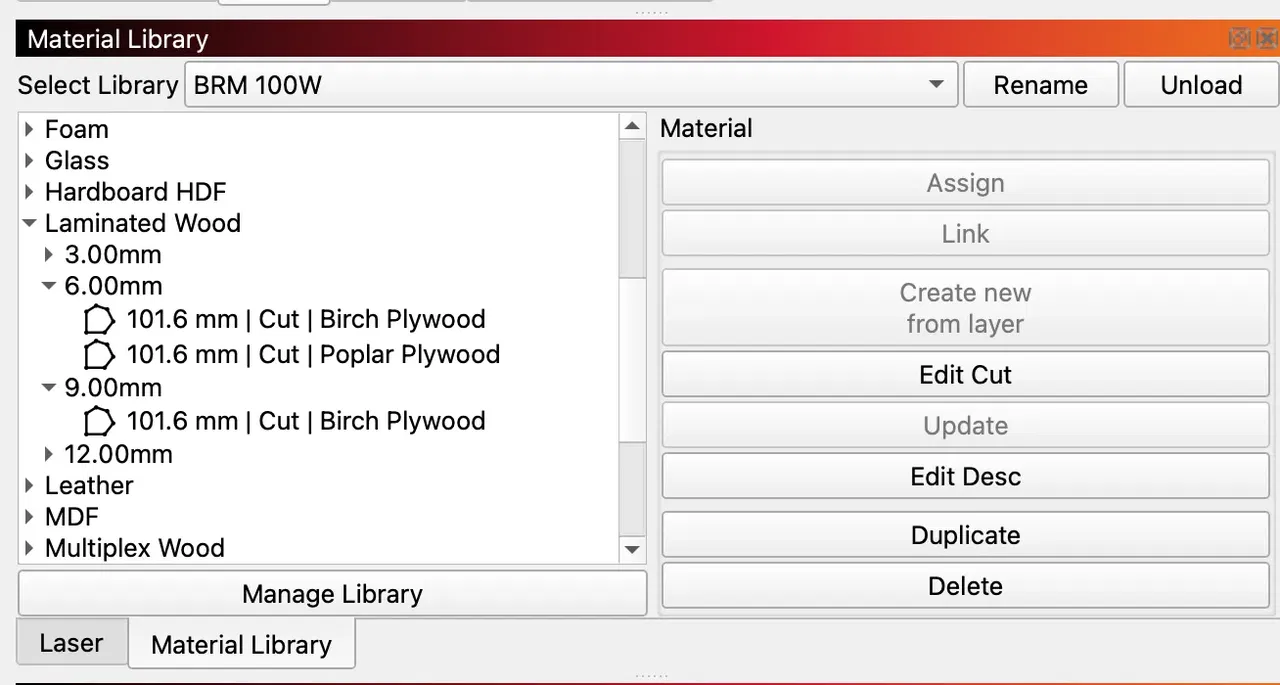
Understanding the library structure
Section titled “Understanding the library structure”The library is organised in three levels:
- Material class (e.g. Laminated Wood)
- Thickness (e.g. 3.00 mm)
- Parameter sets, named in the format:
[preferred lens] | [machining method] | [material-specific name]
Example:
- Laminated Wood
- 3.00 mm
- 63.5 mm | Cut | Poplar Plywood
- 6.00 mm
- 101.6 mm | Cut | Birch Plywood
- 101.6 mm | Cut | Poplar Plywood
- 3.00 mm
The lens distance (63.5 mm, 101.6 mm, etc.) tells you which focus lens the parameters were tuned for. Using a different lens will affect the result.
Step 4: Apply a material to a layer
Section titled “Step 4: Apply a material to a layer”There are two ways to apply a material from the library to a layer: Assign and Link. Both start the same way.
- In the Cuts / Layers window, click the layer you want to set up.
- In the Material Library panel, click the material that matches your job.
- On the right side of the panel, click either Assign or Link.
Assign vs. Link, what’s the difference?
Section titled “Assign vs. Link, what’s the difference?”| Action | What it does | When to use it |
|---|---|---|
| Assign | Copies the parameter values into your layer. Changes on either side stay independent. | One-off jobs, or when you want to tweak parameters for this specific file without affecting the library. |
| Link | Connects the layer to the library entry. Changes on either side stay in sync. | Recurring jobs where you want the layer to always reflect the latest library values. |
Troubleshooting
Section titled “Troubleshooting”-
The library doesn’t show any materials after loading.
Make sure you selected a.clbfile, not the folder. Try clicking Manage Library → Load library again. -
My laser source wattage isn’t in the file list.
The library currently ships for 100 W, 150 W, and 300 W CO₂ sources. If your machine sits between two of these, start from the closest lower wattage and verify on a test piece before running the full job. -
The cut quality is off, even with library settings.
Library values assume the listed lens and a properly aligned, clean machine. Check the lens distance in the parameter set name, verify mirror alignment, and confirm the material matches the entry (e.g. poplar plywood vs. birch plywood behave differently).
Need help?
Section titled “Need help?”If something doesn’t work as expected, contact BRM support by clicking this link with your machine model, laser source wattage, the material entry you used, and a photo of the result.