How do I adjust the auto focus of my BRM Slim and Pro?
Auto focus guide for the BRM Slim and BRM Pro.
What is the auto focus?
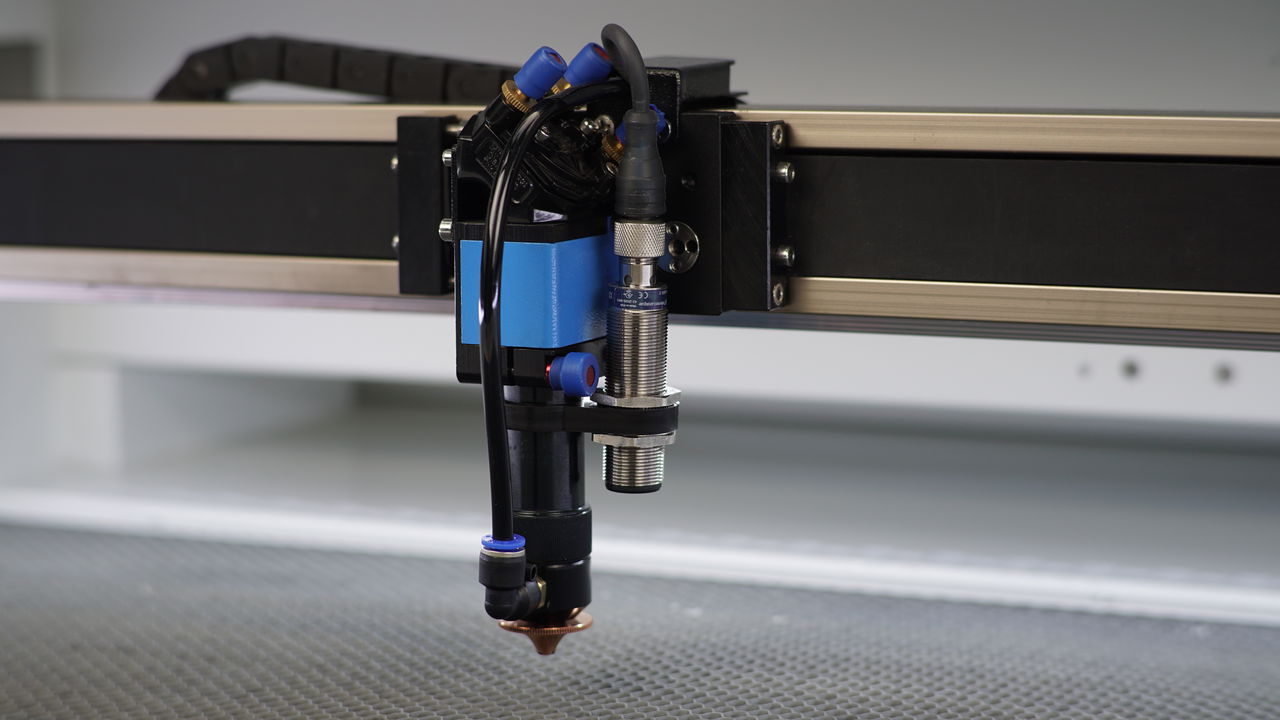
Section titled “What is the auto focus?”The auto focus is a sensor that automatically selects the correct height with regard to your material. This eliminates the need to manually determine the correct focus height between your material and the nozzle (the tip at the bottom of the lens shaft).
The auto focus in the BRM Slim and Pro works through an ultrasonic sensor that measures whether the distance between the sensor and the material is correct. The auto focus sensor emits ultrasonic sound waves. These ultrasonic sound waves hit your material and return to the sensor from there. That takes a certain amount of time. Based on this time, it can determine the correct focus height. It basically works like echolocation. When the sensor notices the right time between sending and receiving, it sends a signal to the main board indicating the focus height is correct.
Is the auto focus sensor able to detect all materials?
Section titled “Is the auto focus sensor able to detect all materials?”Because the sensor works with ultrasonic sound waves, you cannot use the sensor with all materials. Any materials that disturb ultrasonic sound waves, will not be detected by the sensor. Examples are foam, fabric, insulation material or other low-density materials. If the ultrasonic sound waves are disturb then they do not return to the sensor so the sensor does not detect the material and the table may rise too far. This results in a collision between the laser head and the material / the table.
There are also certain types of wood that will disturb ultrasonic sound waves. These are often pieces of wood with a rough surface or bark. Additionally, cork does not cooperate with the ultrasonic sound waves and cannot be used with the auto focus. So don’t assume that the material you want to work with is also suitable for the auto focus function.
Testing the suitability of your material
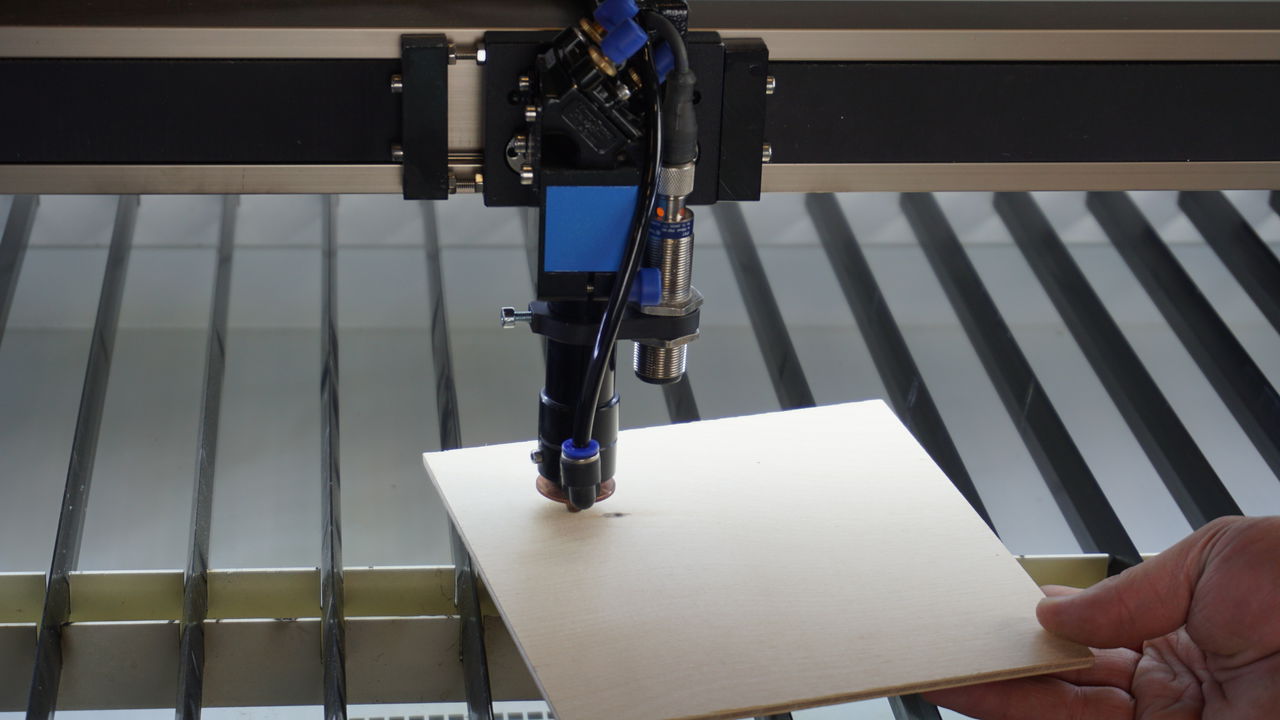
Section titled “Testing the suitability of your material”When you are going to work with a new material you need to first test whether the material will be detected by the sensor.
Lower the worktable. Hold the material in your hands and put it under the auto focus sensor. Make sure it is actually under the sensor and that you keep it straight. If it is only under part of the sensor, it can still be mismeasured. If you move the material towards the sensor, the orange light at the top of the auto focus sensor should turn on. Make sure the auto focus sensor can’t detect your hand.
When the light on the auto focus sensor goes on, your material is detected, and you know you can use the auto focus function. You also hear a click when the light turns on.
When the orange light does not go on while moving it towards the sensor, you cannot and should not use the auto focus function. Instead, you will have to determine the focus height manually. If you use the auto focus function anyway, the chance of a collision is very high. Should damage occur that way, it is not covered by any warranty.
Make sure the lens shaft is at the very top of the laser head. Do that by rotating the bolt on the laser head at the Pro. Rotate the bolt and hold the lens shaft. Position the lens shaft at the very top and re-tighten the bolt. On the Slim, there are two bolts on the right side of the laser head. You can unscrew the lower one while you are holding the lens shaft. Then move the lens shaft up and tighten the bolt again.
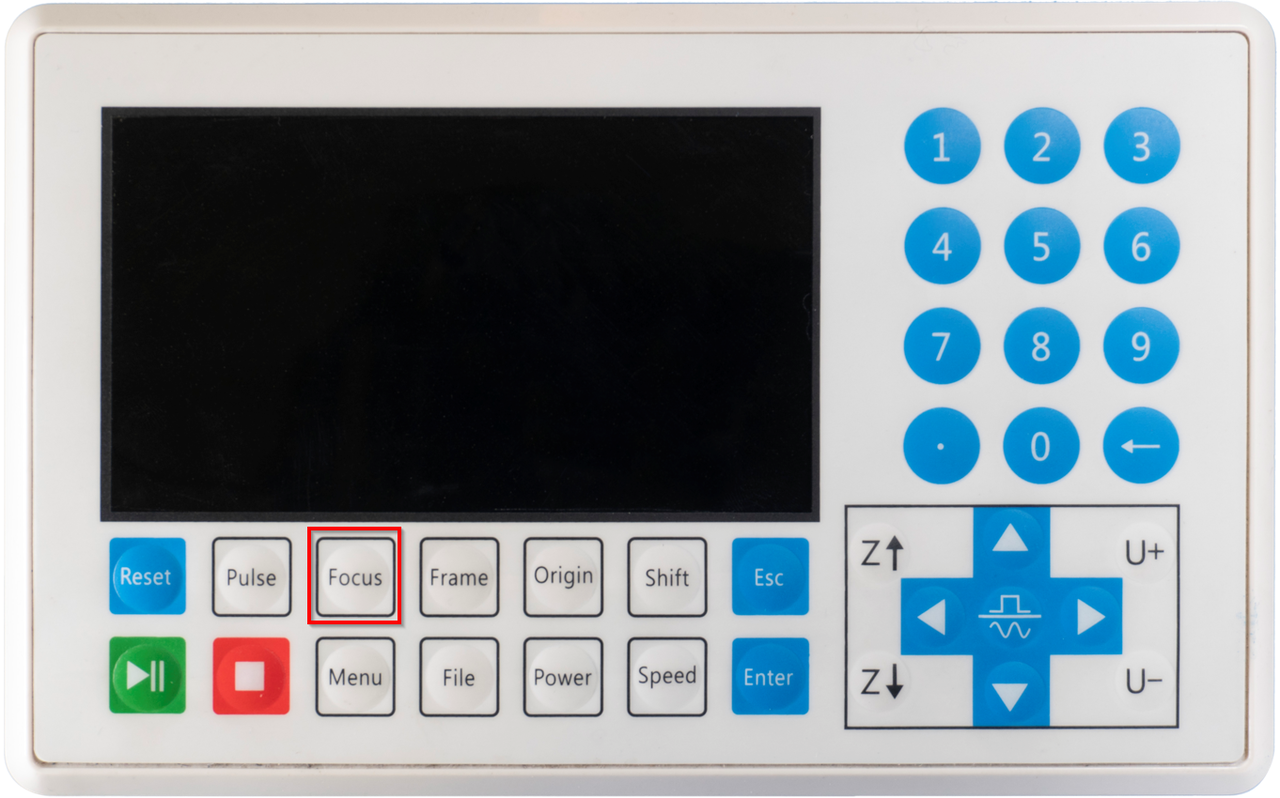
Press the ‘Focus’ button on the machine’s display. The table will rise and stop at the highest point. You will see that the distance between the table and the nozzle is still rather large. Rotate the knob again to lower the lens shaft. Make sure the nozzle (the tip of the lower end of the lens shaft) touches the table. Re-tighten the lens shaft.
Lower the table slightly. Place your material on the table. Make sure there is enough material under the sensor so that the sensor can spot the material. Press the ‘Focus’ button at the display again. Please keep your hand near the emergency stop so you can press it quickly if something goes wrong, especially if this is your first time working with this material.
If all goes well, the table stops moving and the orange light on the sensor is on. Look for a red dot, from the red pointer, on your material. Be aware, the key switch for the laser has to be turned to the right to be able to see the red dot. If you do not see that you are too close to the material. Should you see a large dot, you are too far away from it. Press the ‘Focus’ button again to see if that fixes the problem.
When the light on the auto focus sensor does not come on at all, regardless of the material you place under it, it might be that the plug at the top of the sensor is not properly fitted into the sensor. You can take the plug out and reattach it. There is a small pin in the plug that should fall into a hole in the sensor. In other words, it can only be inserted into the sensor in one way. Connecting the plug incorrectly and pressing too hard can break the pin, and the plug and cable need to be replaced. So make sure you do this properly.
If you can’t work things out, please feel free to submit a ticket.