Mirror alignment for Open Bed machines
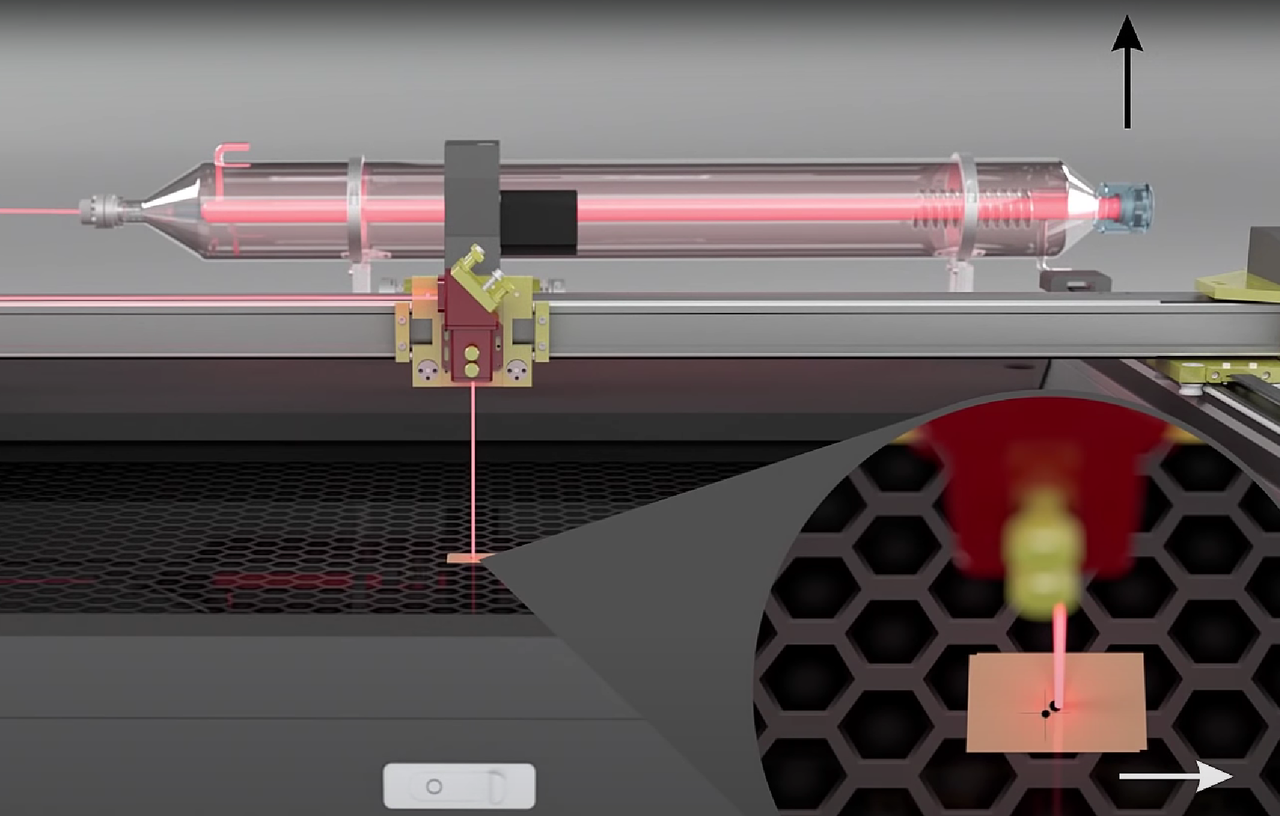
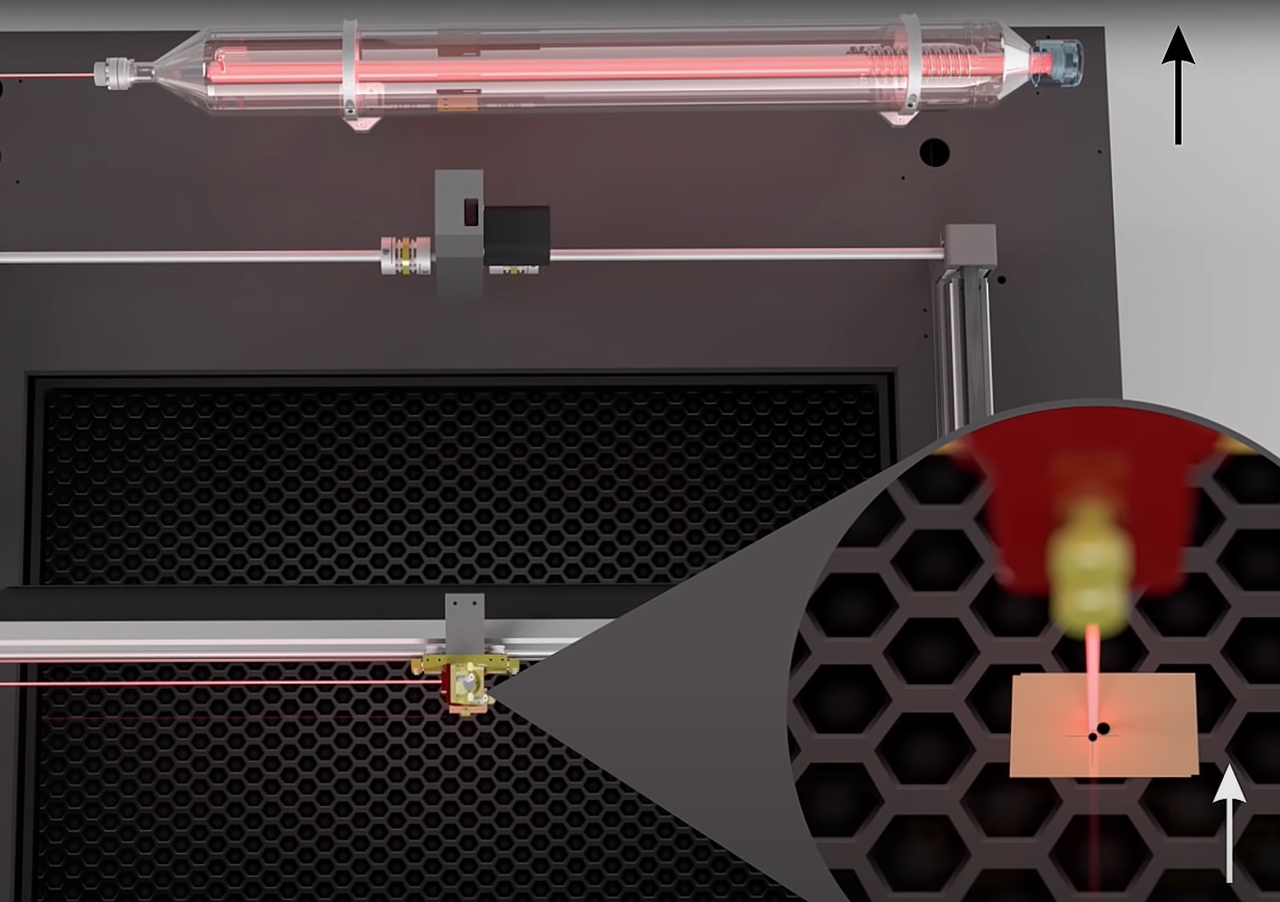
Your Open Bed laser beam travels from the source through mirrors to the lens, then to your material. Proper mirror alignment ensures the beam hits the center of each mirror and lens across the entire work area, maximizing power and cut quality.
Clean first, then align. Dirty optics reduce power and affect beam position. Always clean mirrors and clean the lens before adjusting alignment.
Required materials
Section titled “Required materials”- Masking tape (multiple pieces)
- Allen key set
- Wrench set (for adjustment nuts)
- Pen and ruler
- Patience (alignment takes time and precision)
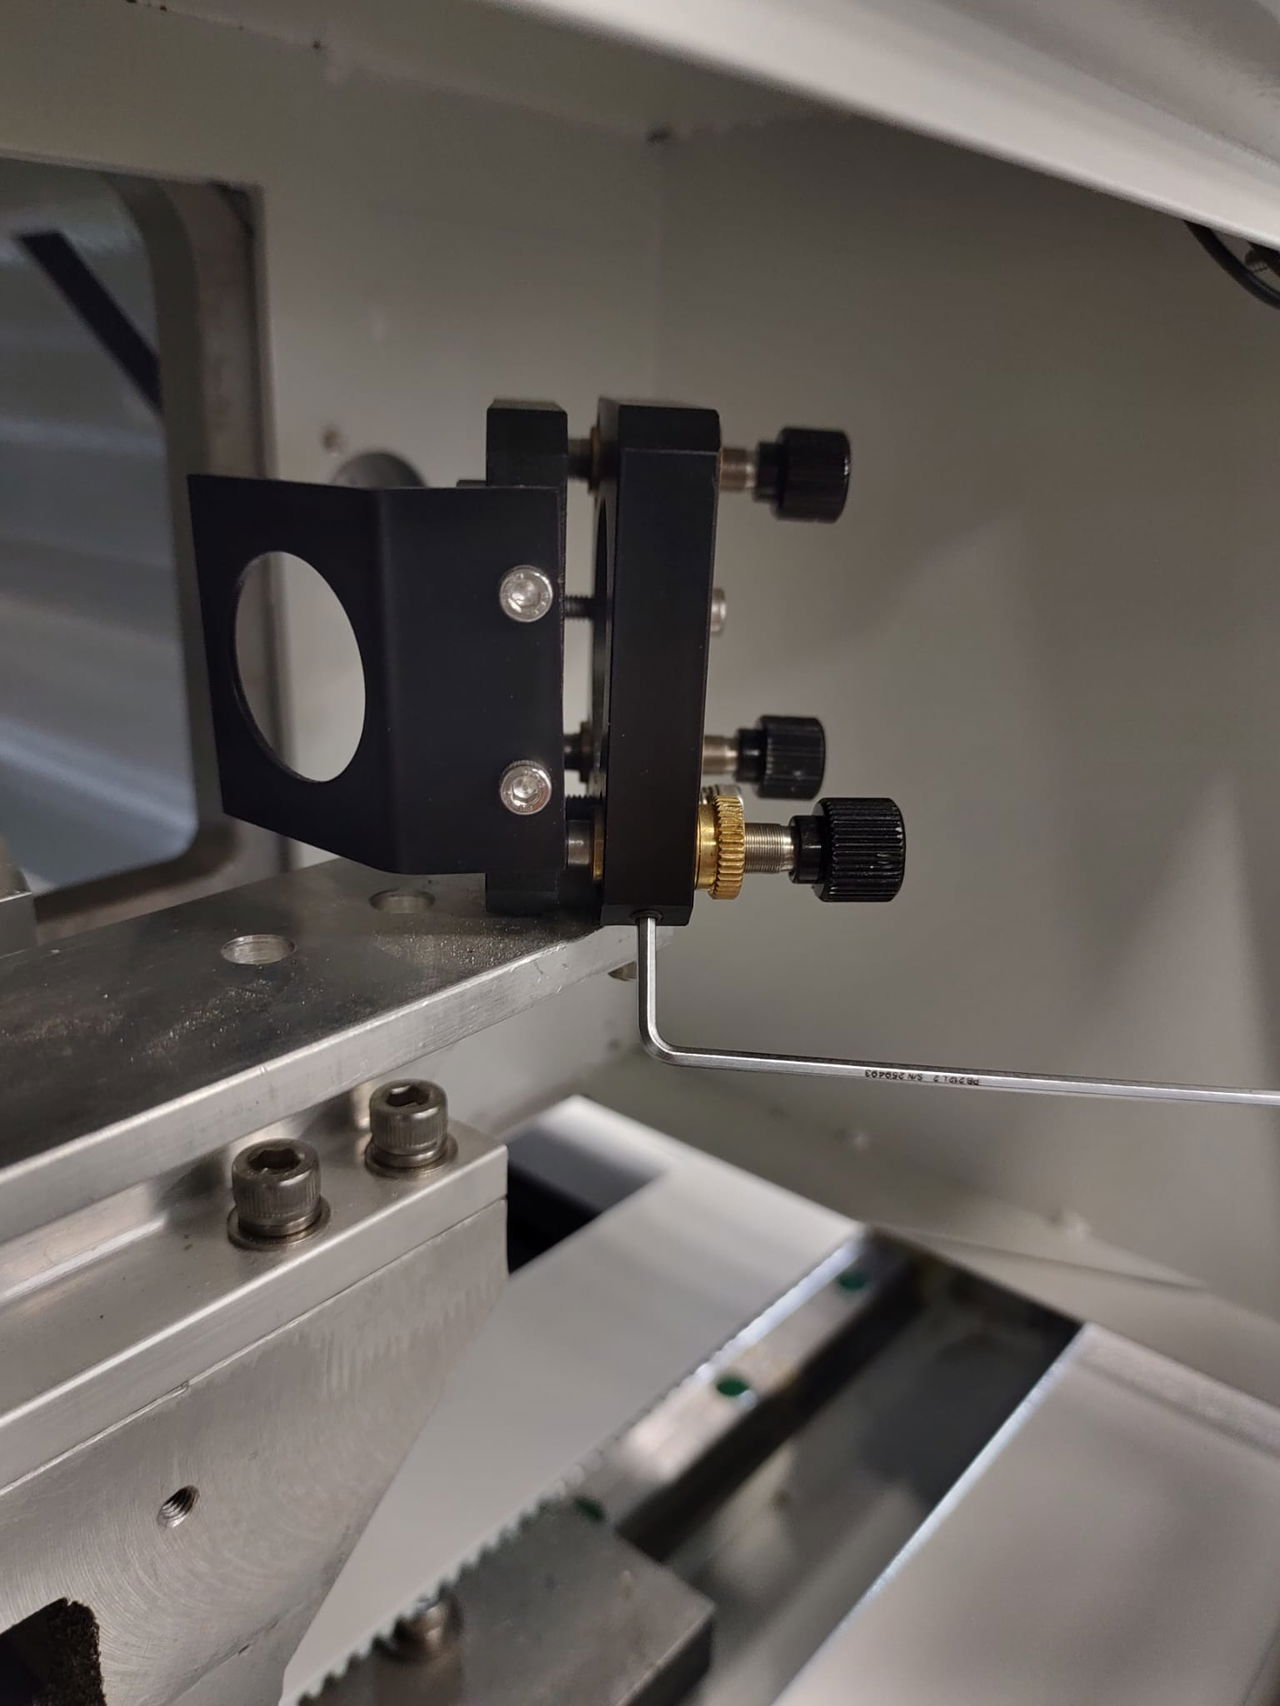
Step 1: Align Mirror 1 (first mirror on bridge)
Section titled “Step 1: Align Mirror 1 (first mirror on bridge)”Check fixation bolts
Section titled “Check fixation bolts”- Open the door on the left side of the bridge
- Locate the two black mirror holders inside
- Use an Allen key to check the small socket screws on the holders are tight
- Tighten any loose screws (these secure the adjustment bolts and nuts)
Test Mirror 1 alignment
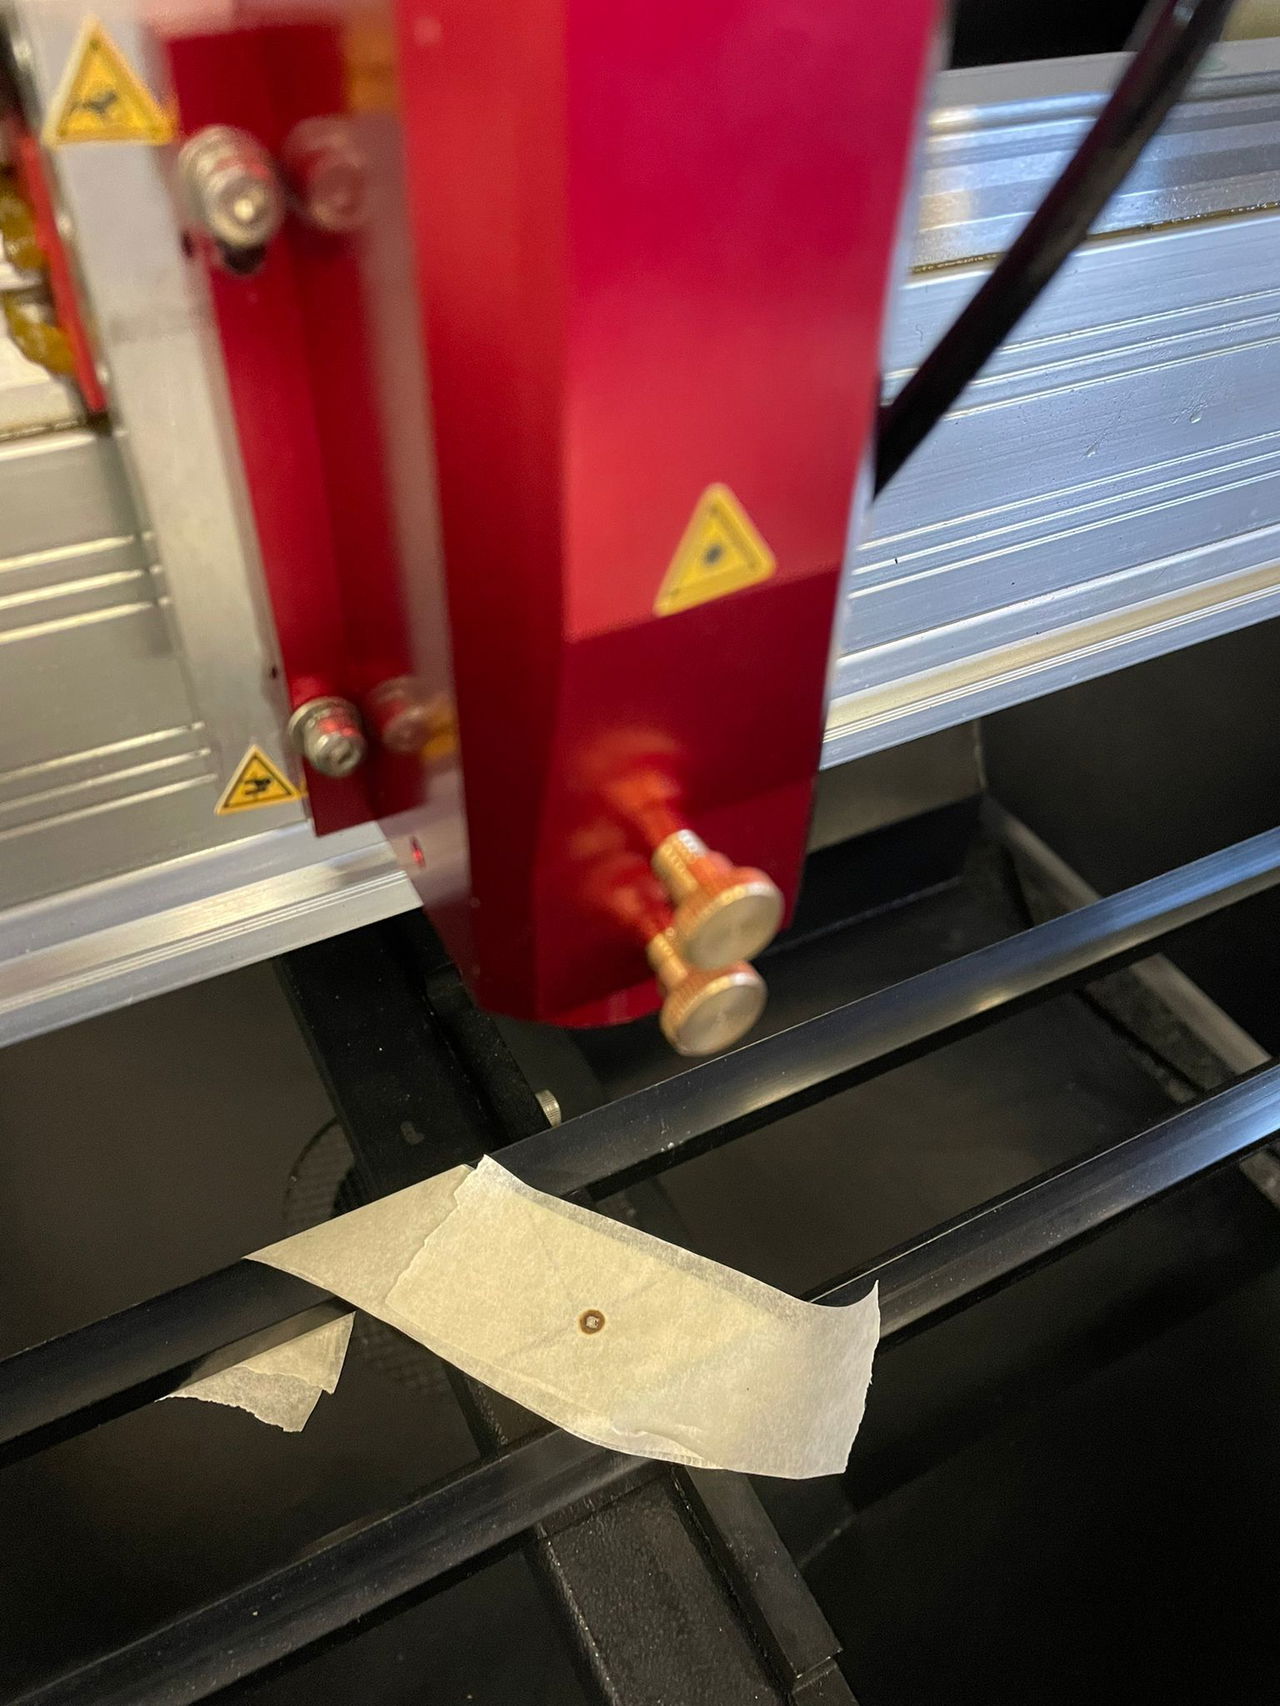
Section titled “Test Mirror 1 alignment”- Prepare tape target: Tape two pieces of masking tape together
- Attach to opening: Stick tape to the opening on the right mirror holder
- Close door and set a pulse
- Check position: The pulse should be centered in the opening

Adjust Mirror 1 if needed
Section titled “Adjust Mirror 1 if needed”If the pulse is not centered, adjust the left mirror (first mirror):
Adjustment bolts you use:
- Top right bolt: Adjusts beam height (up/down)
- Bottom left bolt: Adjusts beam position (left/right)
Do NOT use:
- Bottom right adjustment bolt
- Allen bolts (these are for fixation only)
Adjustment procedure:
- Loosen locking nut slightly on the bolt you need to adjust
- Turn adjustment bolt to move the beam
- Tighten locking nut when done
- Set a new pulse to verify (bolt may shift when tightening)
- Move top tape layer before each new pulse so you can see the new mark clearly
- Repeat until pulse is centered
When the pulse hits the center, remove the tape and close the door.
Step 2: Align Mirror 2 (second mirror on bridge)
Section titled “Step 2: Align Mirror 2 (second mirror on bridge)”Test alignment across work area
Section titled “Test alignment across work area”- Open front cover to access the laser head
- Stick 2 layers of masking tape on the left side opening of the laser head
- Close front cover
- Move laser head to far left of the work area
- Set a pulse
- Move laser head to far right of the work area
- Open front cover and stick a third piece of tape over the existing tape
- Close front cover and set a pulse
Check the results
Section titled “Check the results”Compare the two pulses on the tape:
- Ideal: Both pulses overlap exactly and are centered in the opening
- Needs adjustment: Pulses are not overlapping or not centered
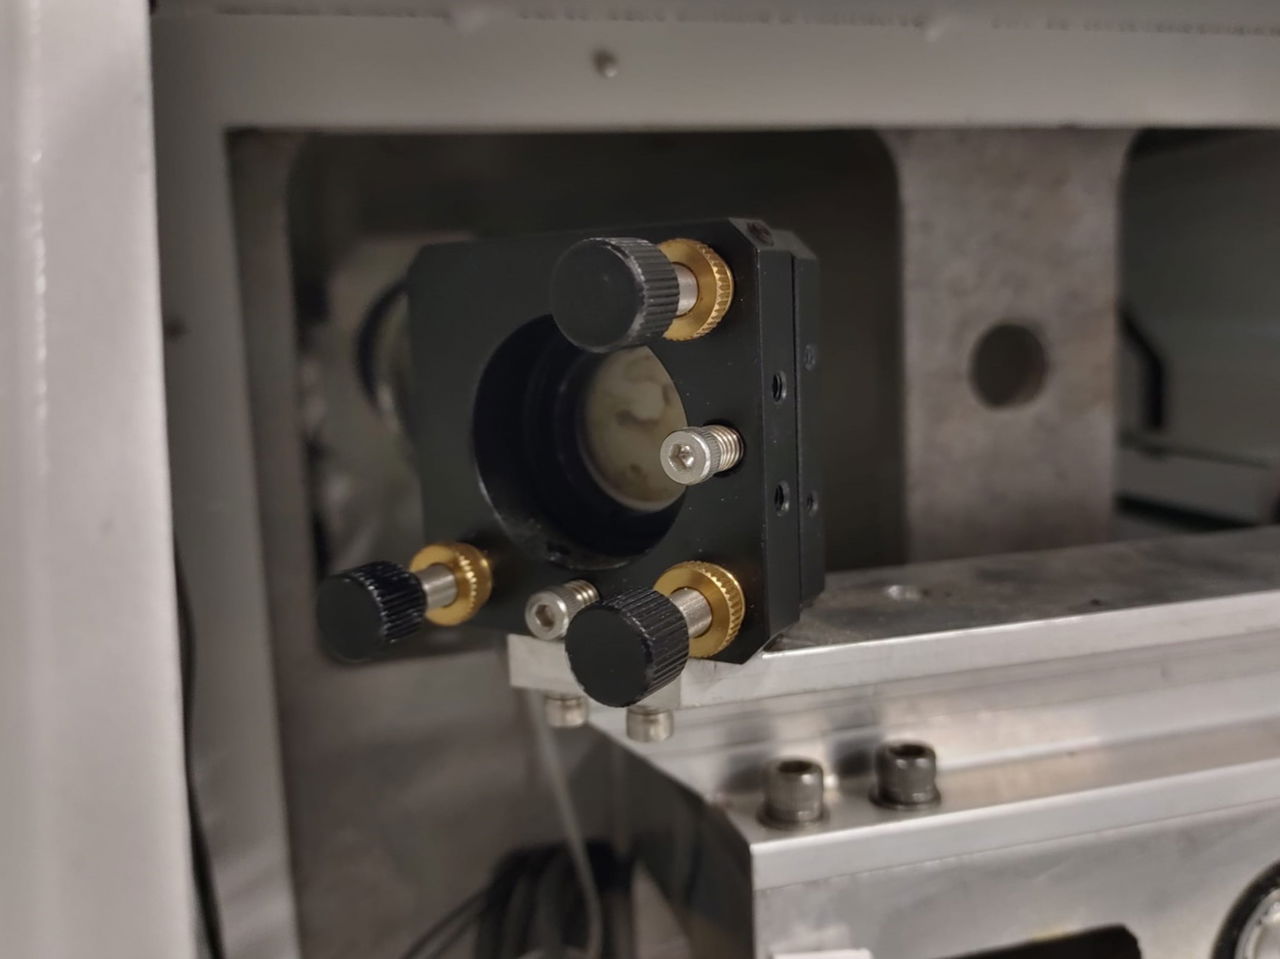
Adjust Mirror 2 if needed
Section titled “Adjust Mirror 2 if needed”If alignment is off, adjust the second mirror (right mirror behind the door):
Adjustment bolts you use:
- Top right bolt: Adjusts beam height (up/down)
- Bottom left bolt: Adjusts beam position (left/right)
Do NOT use:
- Bottom right adjustment bolt
- Allen bolts (these are for fixation only)
Adjustment procedure:
- Loosen locking nut slightly on the bolt you need to adjust
- Turn adjustment bolt to move the beam
- Tighten locking nut when done
- Set new pulses following the test procedure above
- Move top tape layer before each test so you can see new marks
- Repeat until both pulses overlap and are centered
When pulses are aligned, remove the tape.
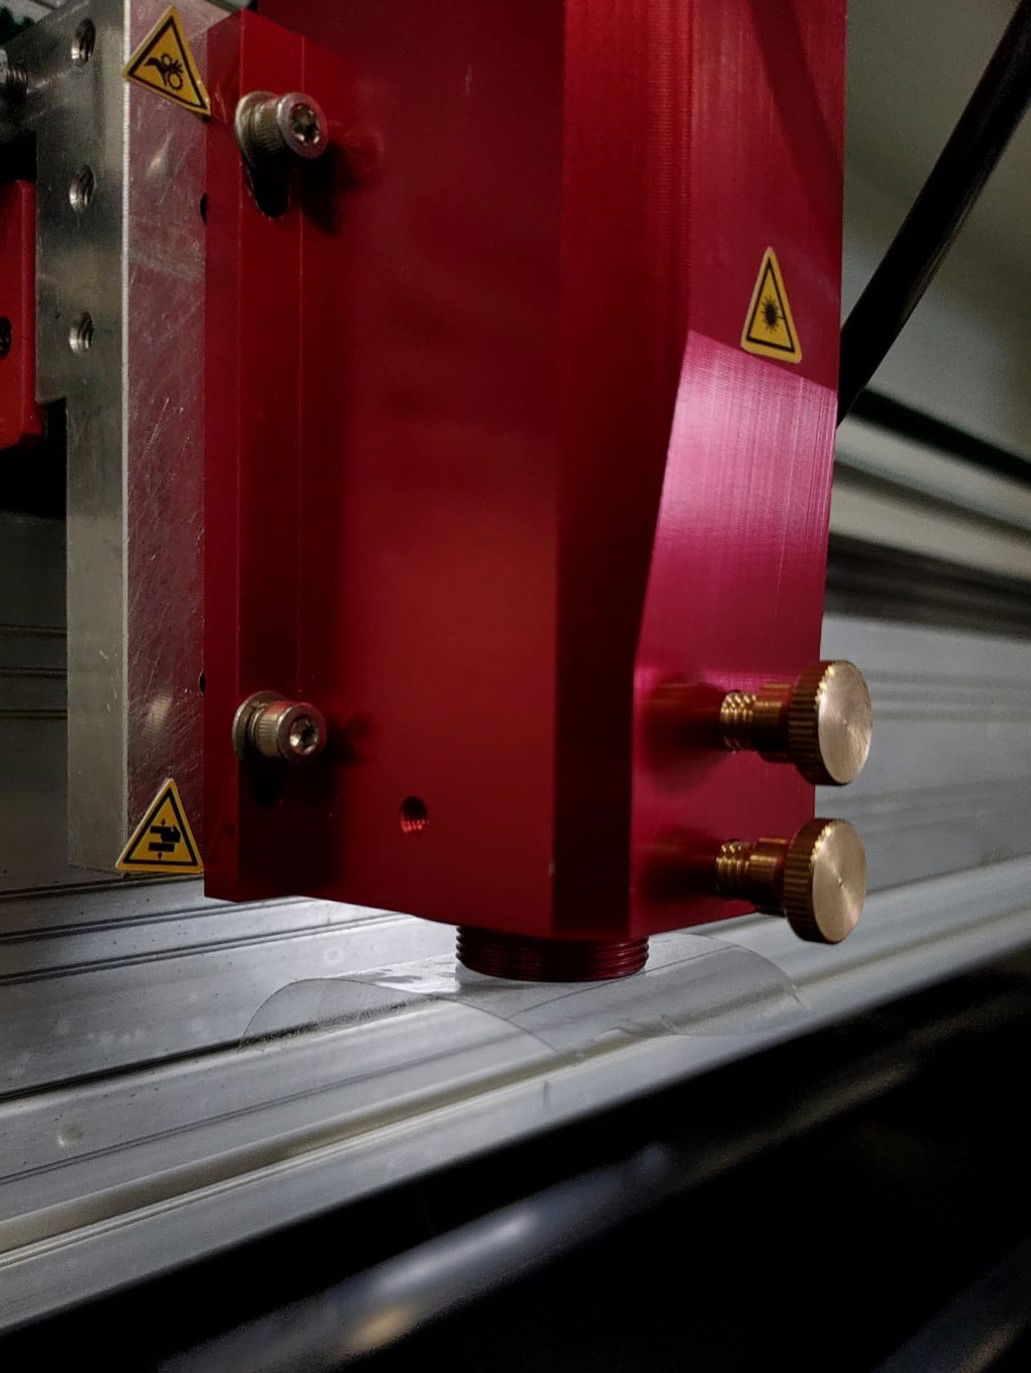
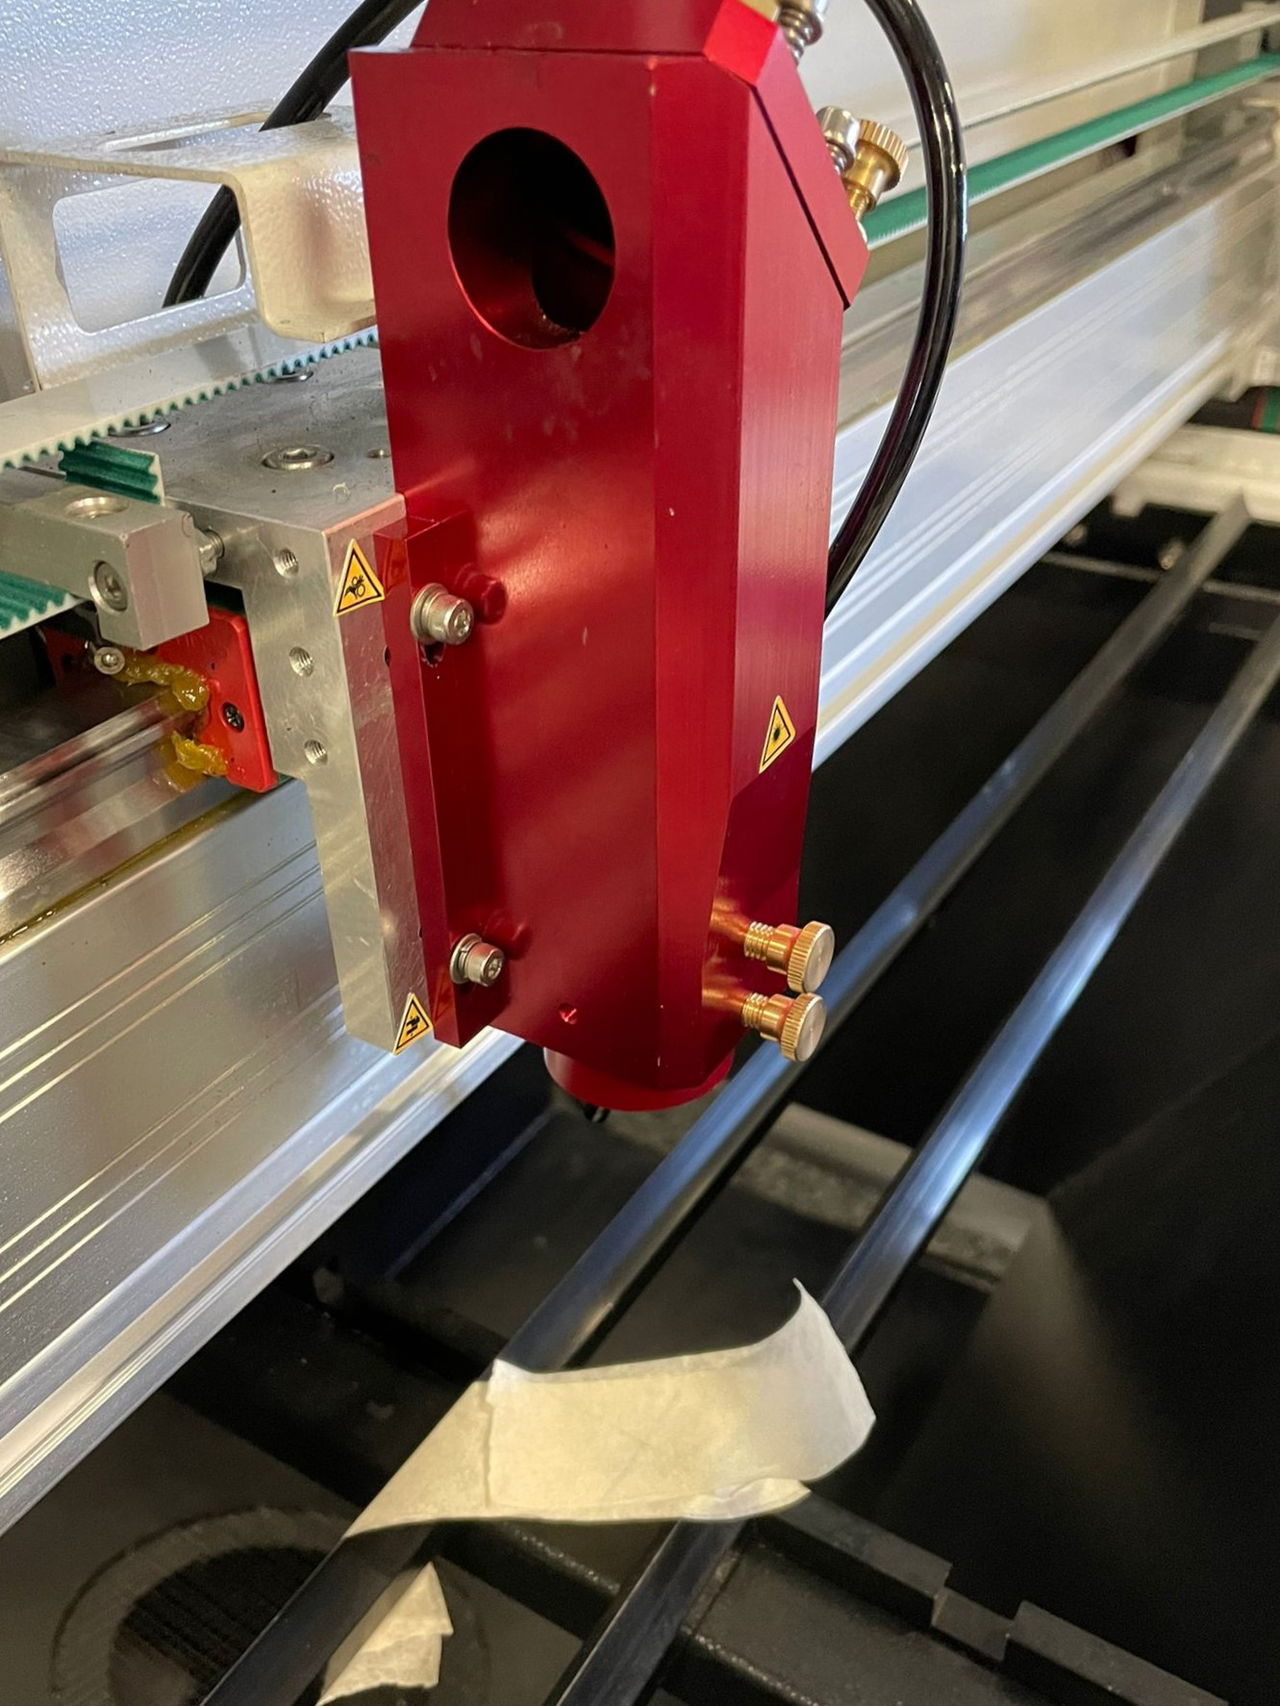
Step 3: Align Mirror 3 (mirror on laser head)
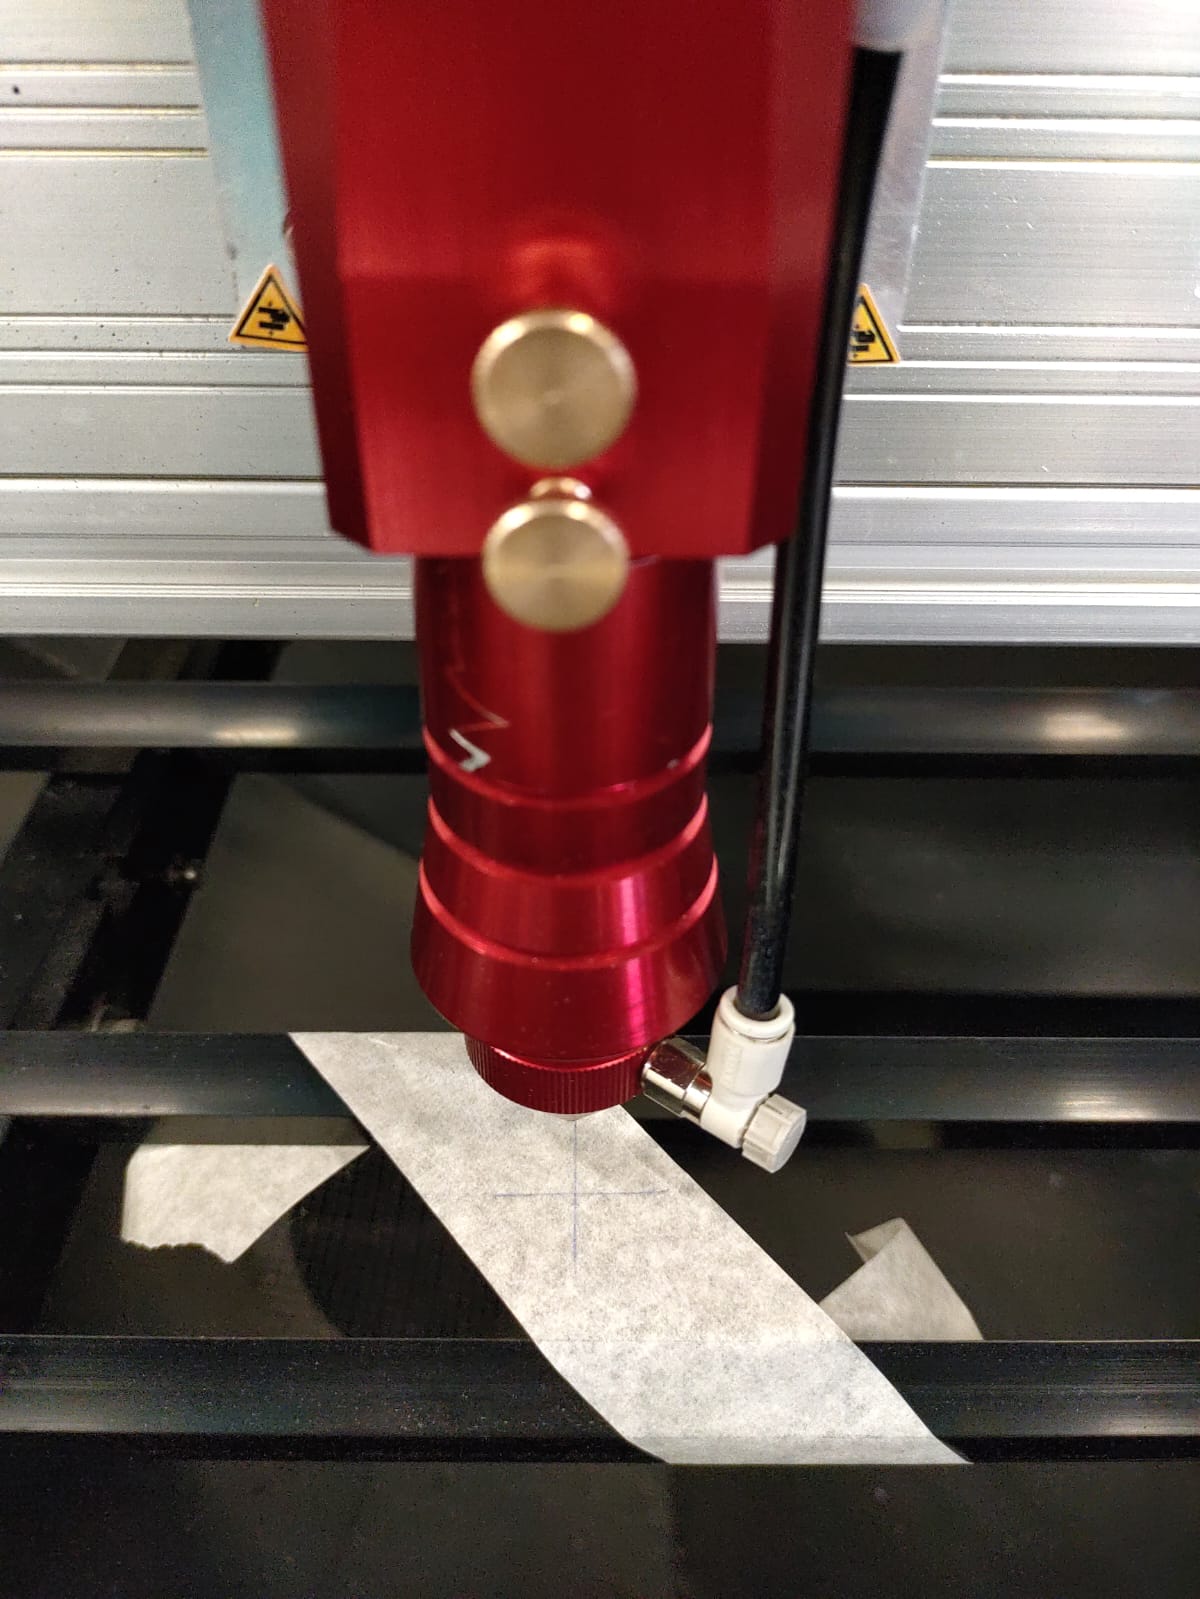
Section titled “Step 3: Align Mirror 3 (mirror on laser head)”Prepare the lens shaft for testing
Section titled “Prepare the lens shaft for testing”- Remove lens shaft from the laser head
- Unscrew the two parts of the lens shaft from each other
- Set aside the lower part (you won’t need it yet)
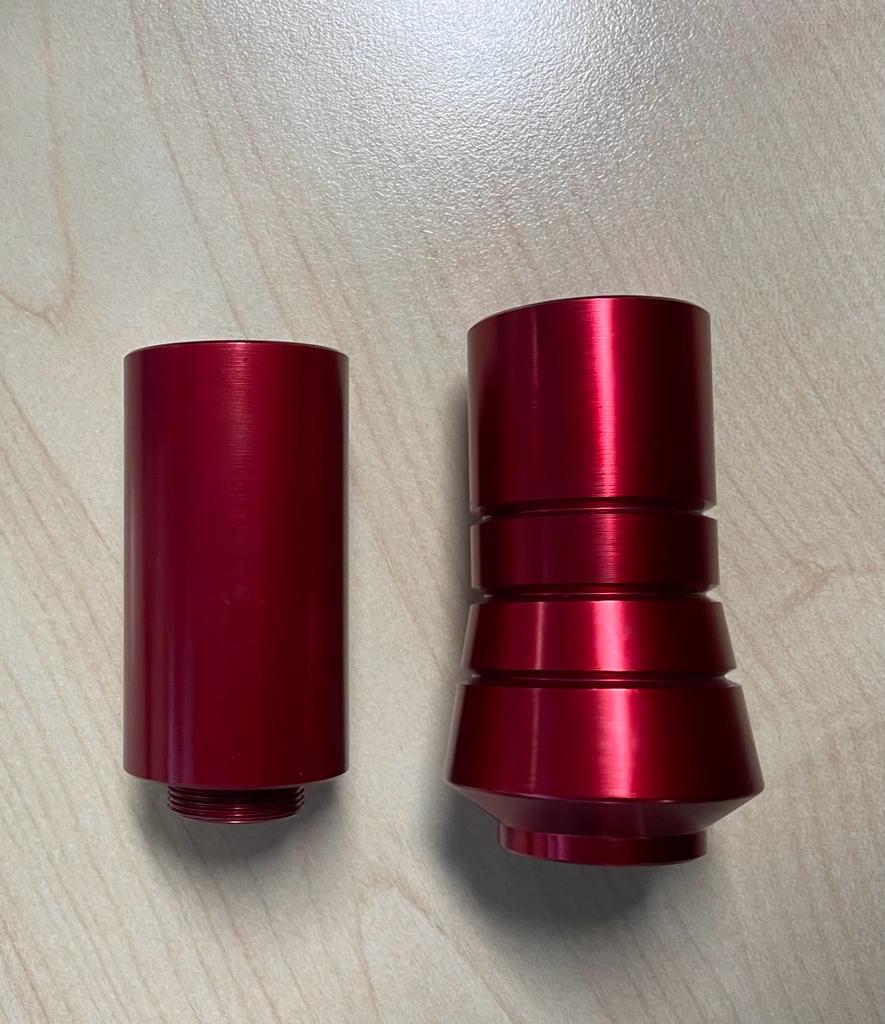
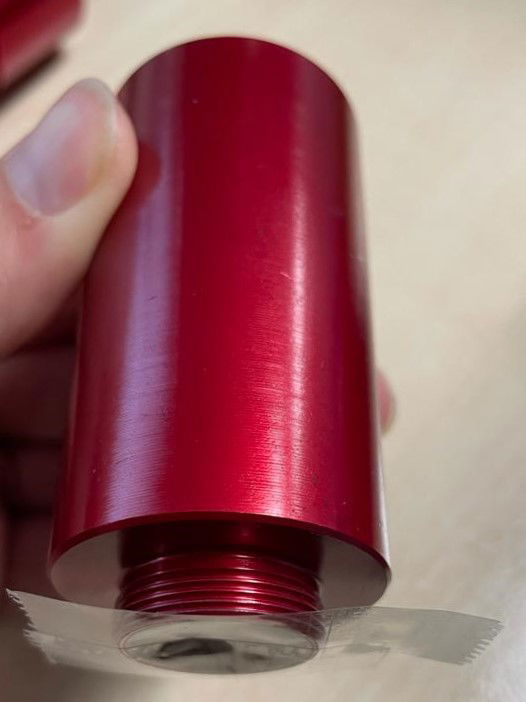
- Stick transparent tape on the threaded bottom of the upper part to cover the opening
- Place upper part back in the laser head as high as possible
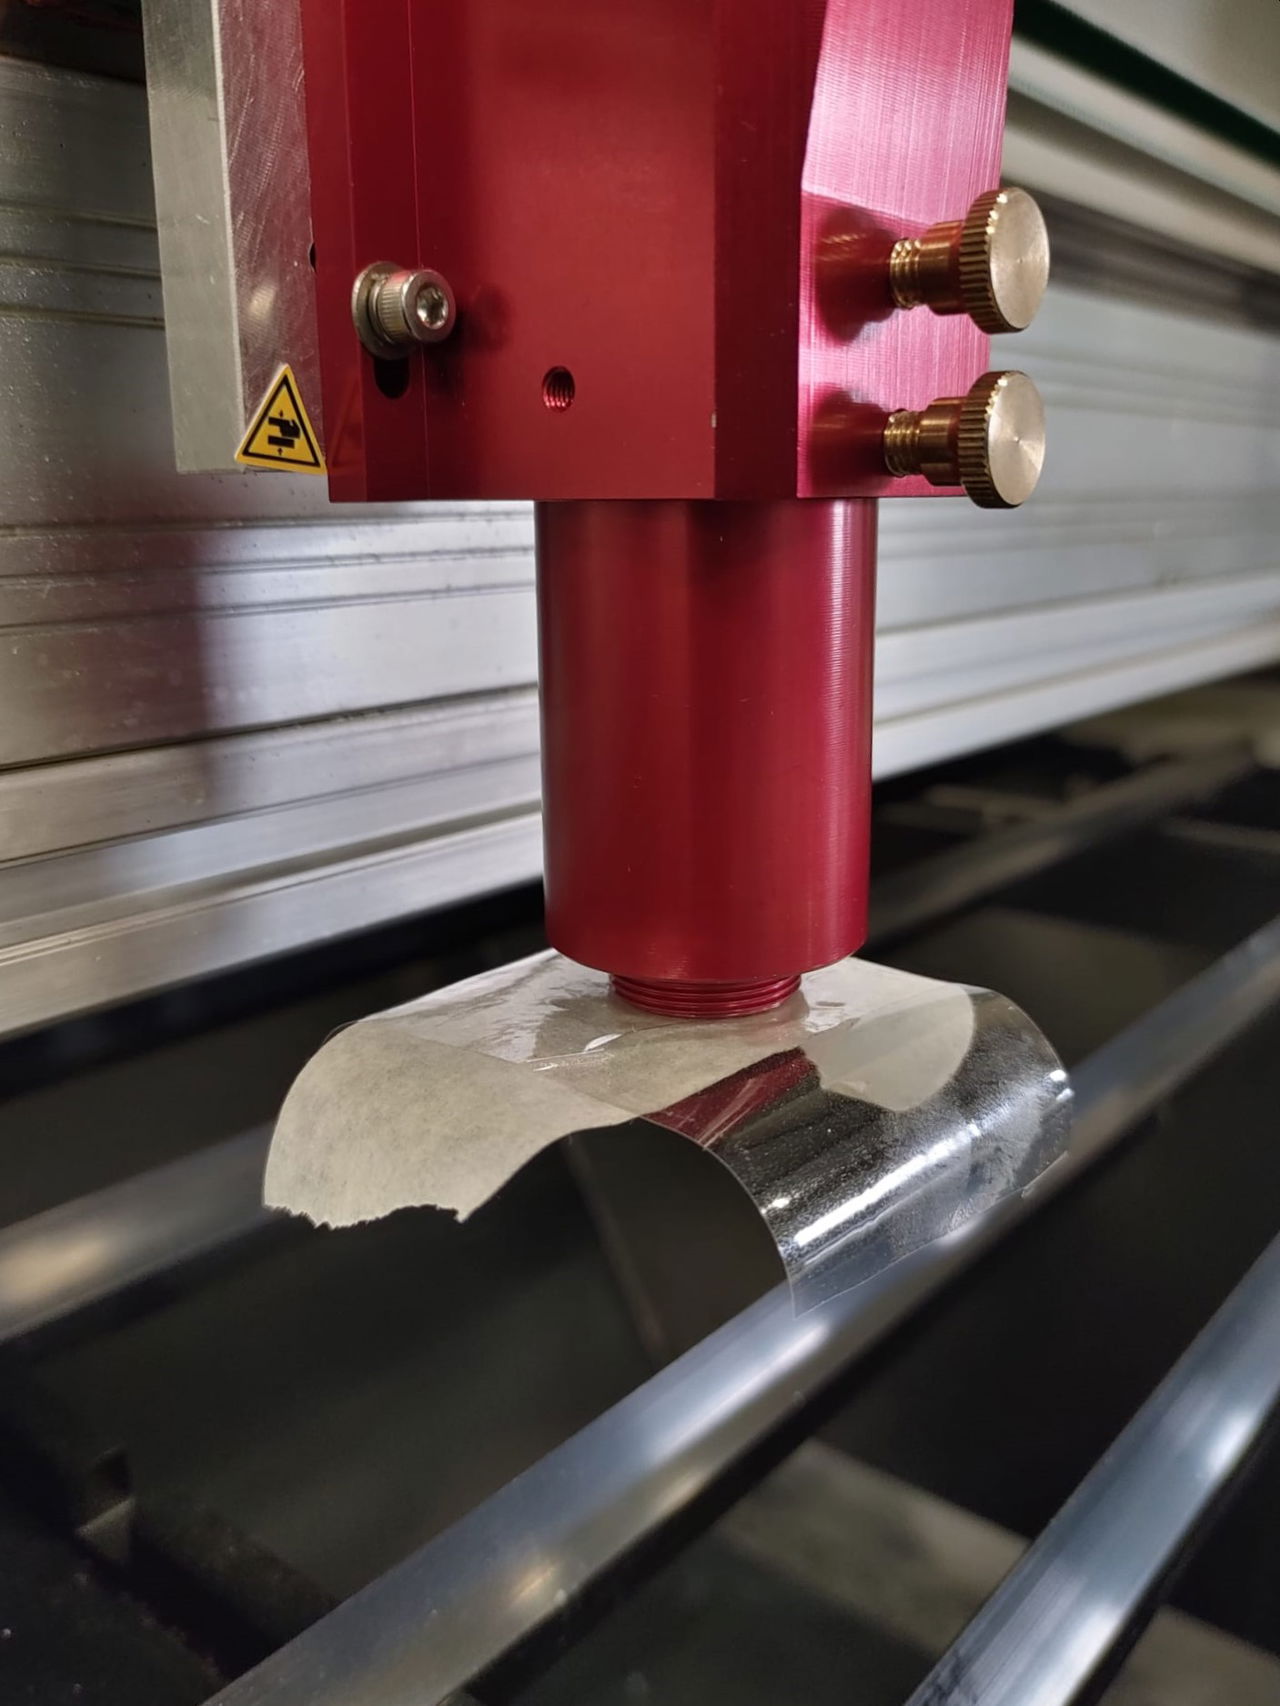
Test Mirror 3 alignment
Section titled “Test Mirror 3 alignment”- Close front cover and set 2 pulses
- Lower the lens shaft straight down (do not rotate it)
- Secure at lowest position
- Stick masking tape crosswise over the clear tape
- Set a pulse
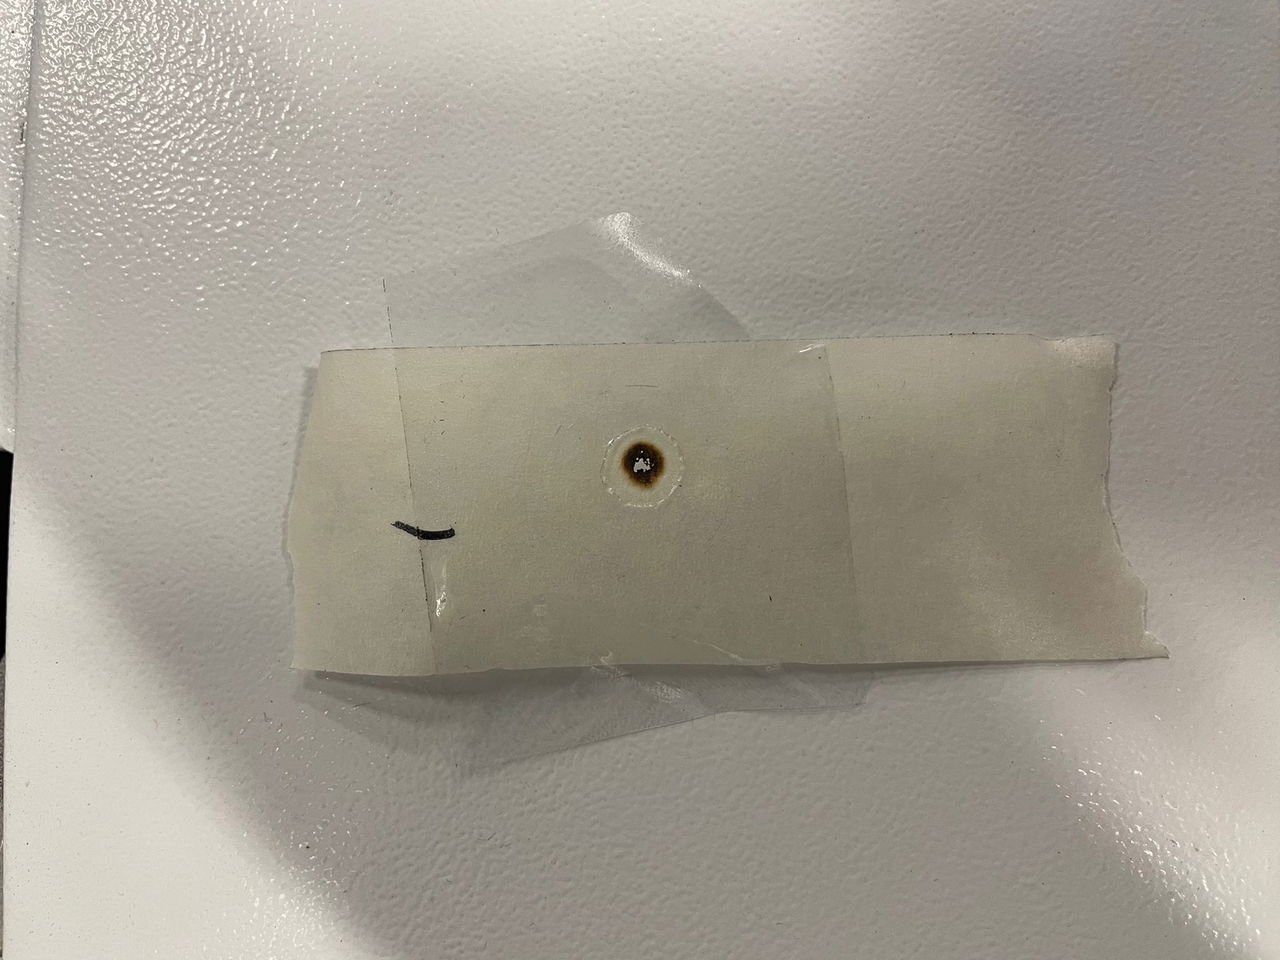
Check alignment
Section titled “Check alignment”- Remove both tape layers together (keep them stuck together)
- Inspect the burn mark on the masking tape
- Check position: The burn should be centered in the large hole of the clear tape
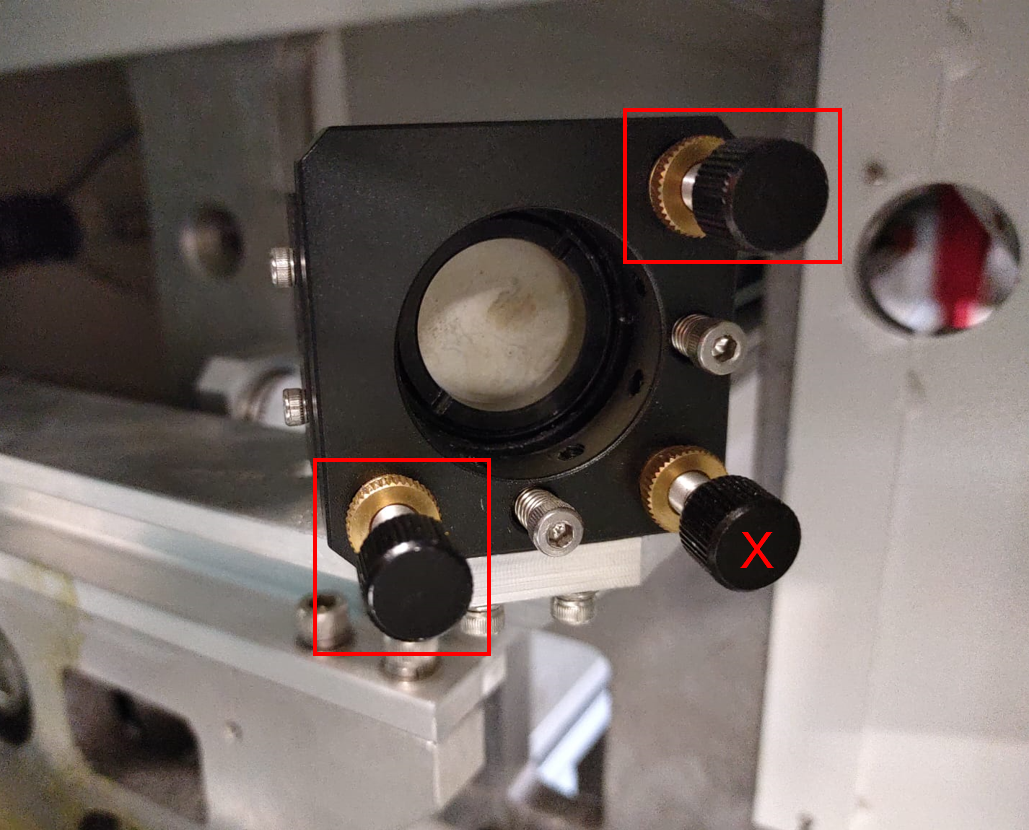
Adjust Mirror 3 if needed
Section titled “Adjust Mirror 3 if needed”If the burn is not centered, adjust the laser head mirror:
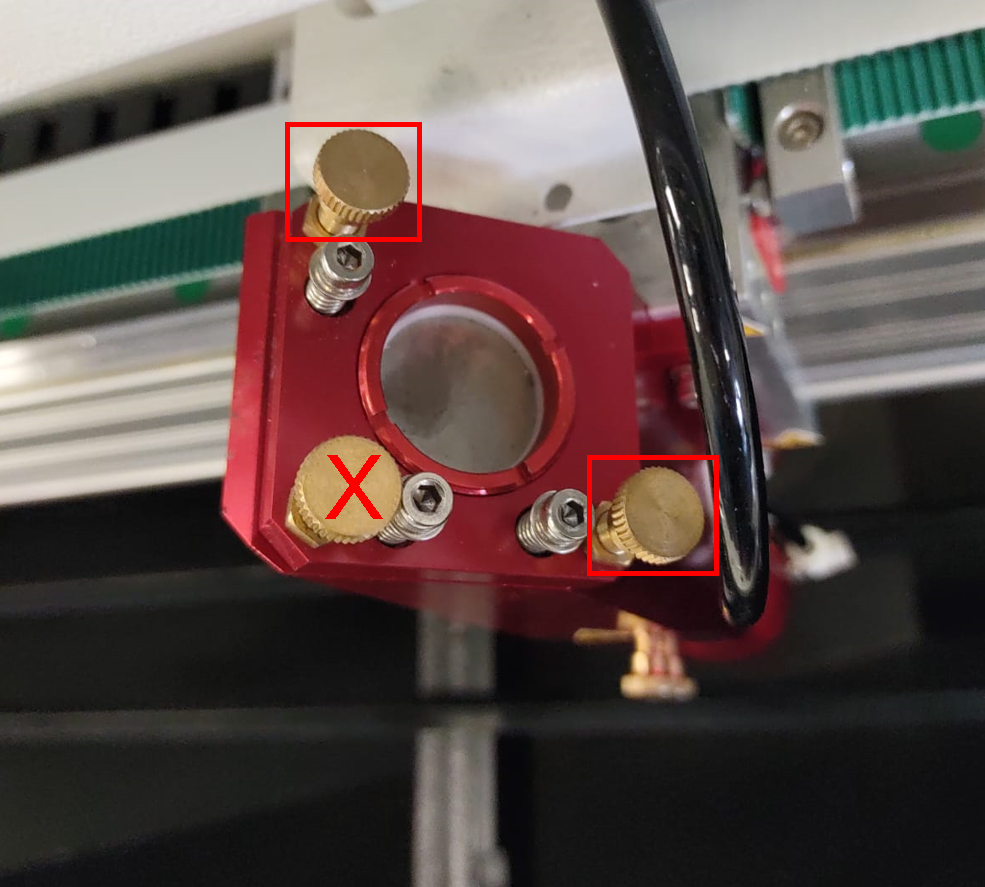
Adjustment bolts you use:
- Top left bolt: Adjusts beam height (up/down)
- Bottom right bolt: Adjusts beam position (left/right)
Do NOT use:
- Bottom left adjustment bolt
- Silver Allen bolts (these are for fixation only)
Adjustment procedure:
- Loosen locking nut slightly on the bolt you need to adjust
- Turn adjustment bolt to move the beam (use your tape marks to know which direction)
- Tighten locking nut when done
- Repeat the entire test (bolt may shift when tightening)
- Continue until burn is centered
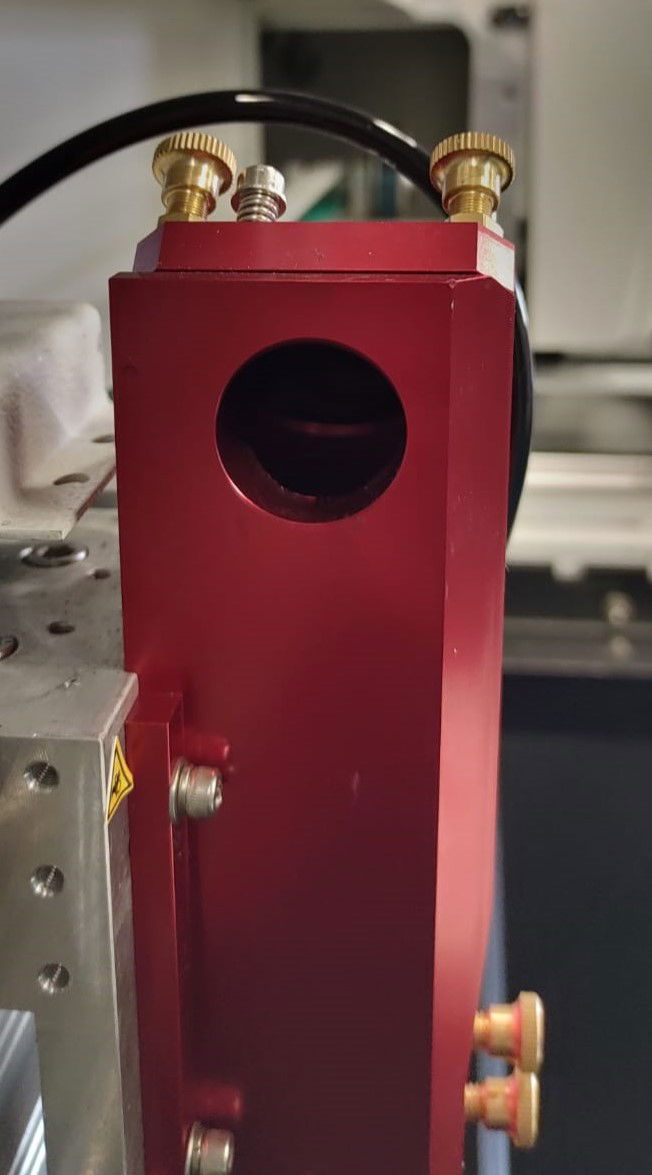
Step 4: Align laser source (final alignment)
Section titled “Step 4: Align laser source (final alignment)”After all mirrors are aligned, verify the laser source alignment with a “plus test.”
Prepare the test
Section titled “Prepare the test”- Stick masking tape on 2 slats under the laser head
- Reassemble lens shaft: Put upper part in laser head, screw lower part (with lens) onto it
- Set correct focus height
- Close front cover and set a pulse
- Draw a plus sign with pen and ruler across the pulse on the tape
Test laser source alignment
Section titled “Test laser source alignment”- Unscrew lower lens shaft part and set aside
- Stick new masking tape over the plus sign
- Set a pulse
Check result: The pulse should be centered on the plus sign. If not, the laser source needs adjustment.
Adjust laser source if needed
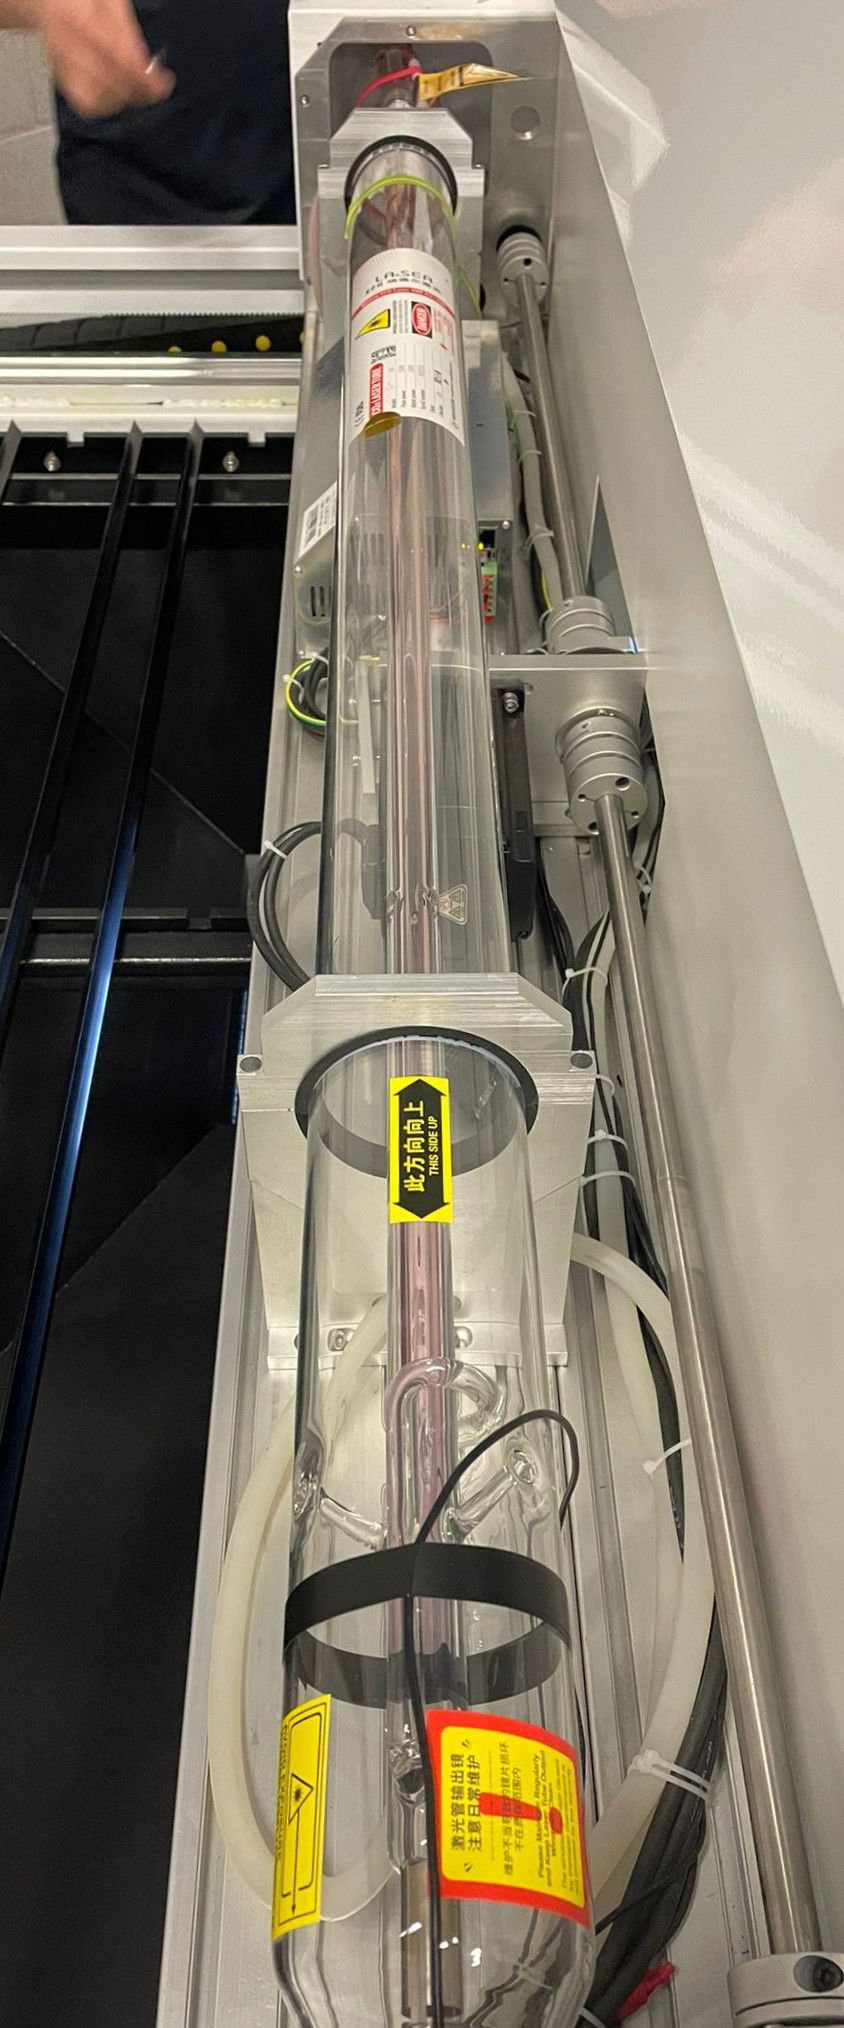
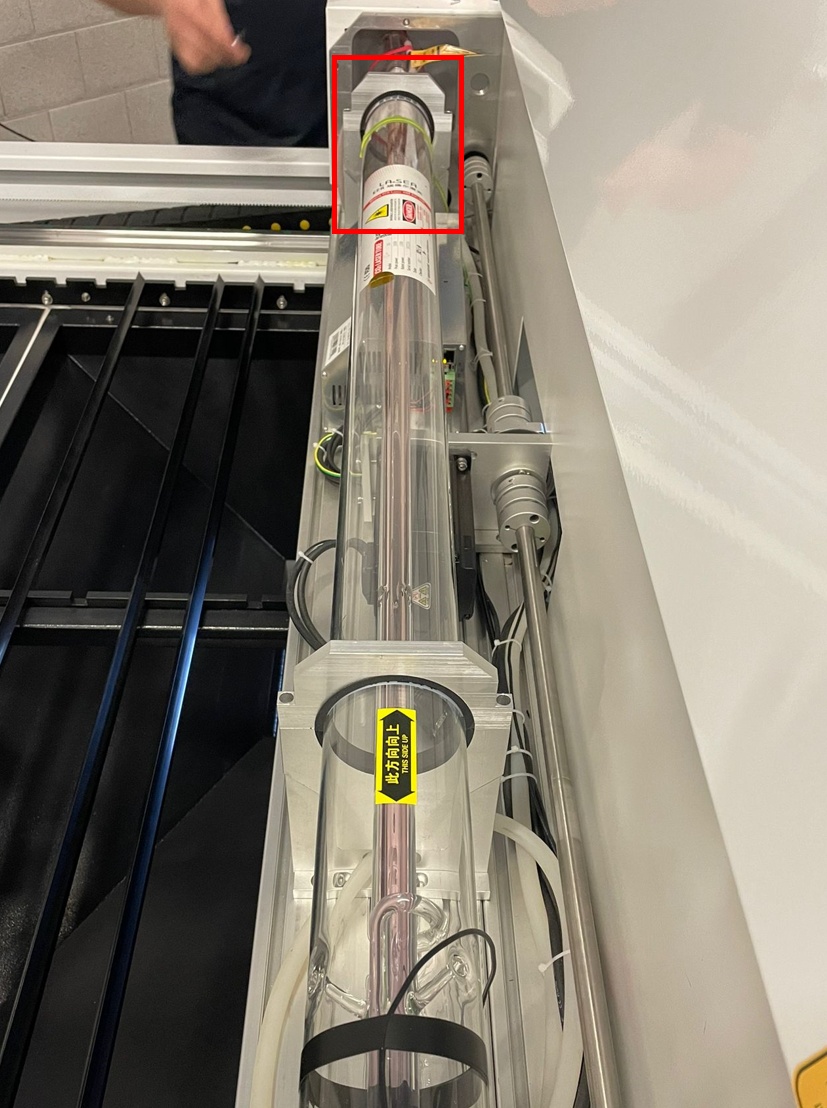
Section titled “Adjust laser source if needed”Access the laser source:
- Locate the laser source on the bridge
- Remove the Allen bolts securing the panel
- Carefully remove the cover
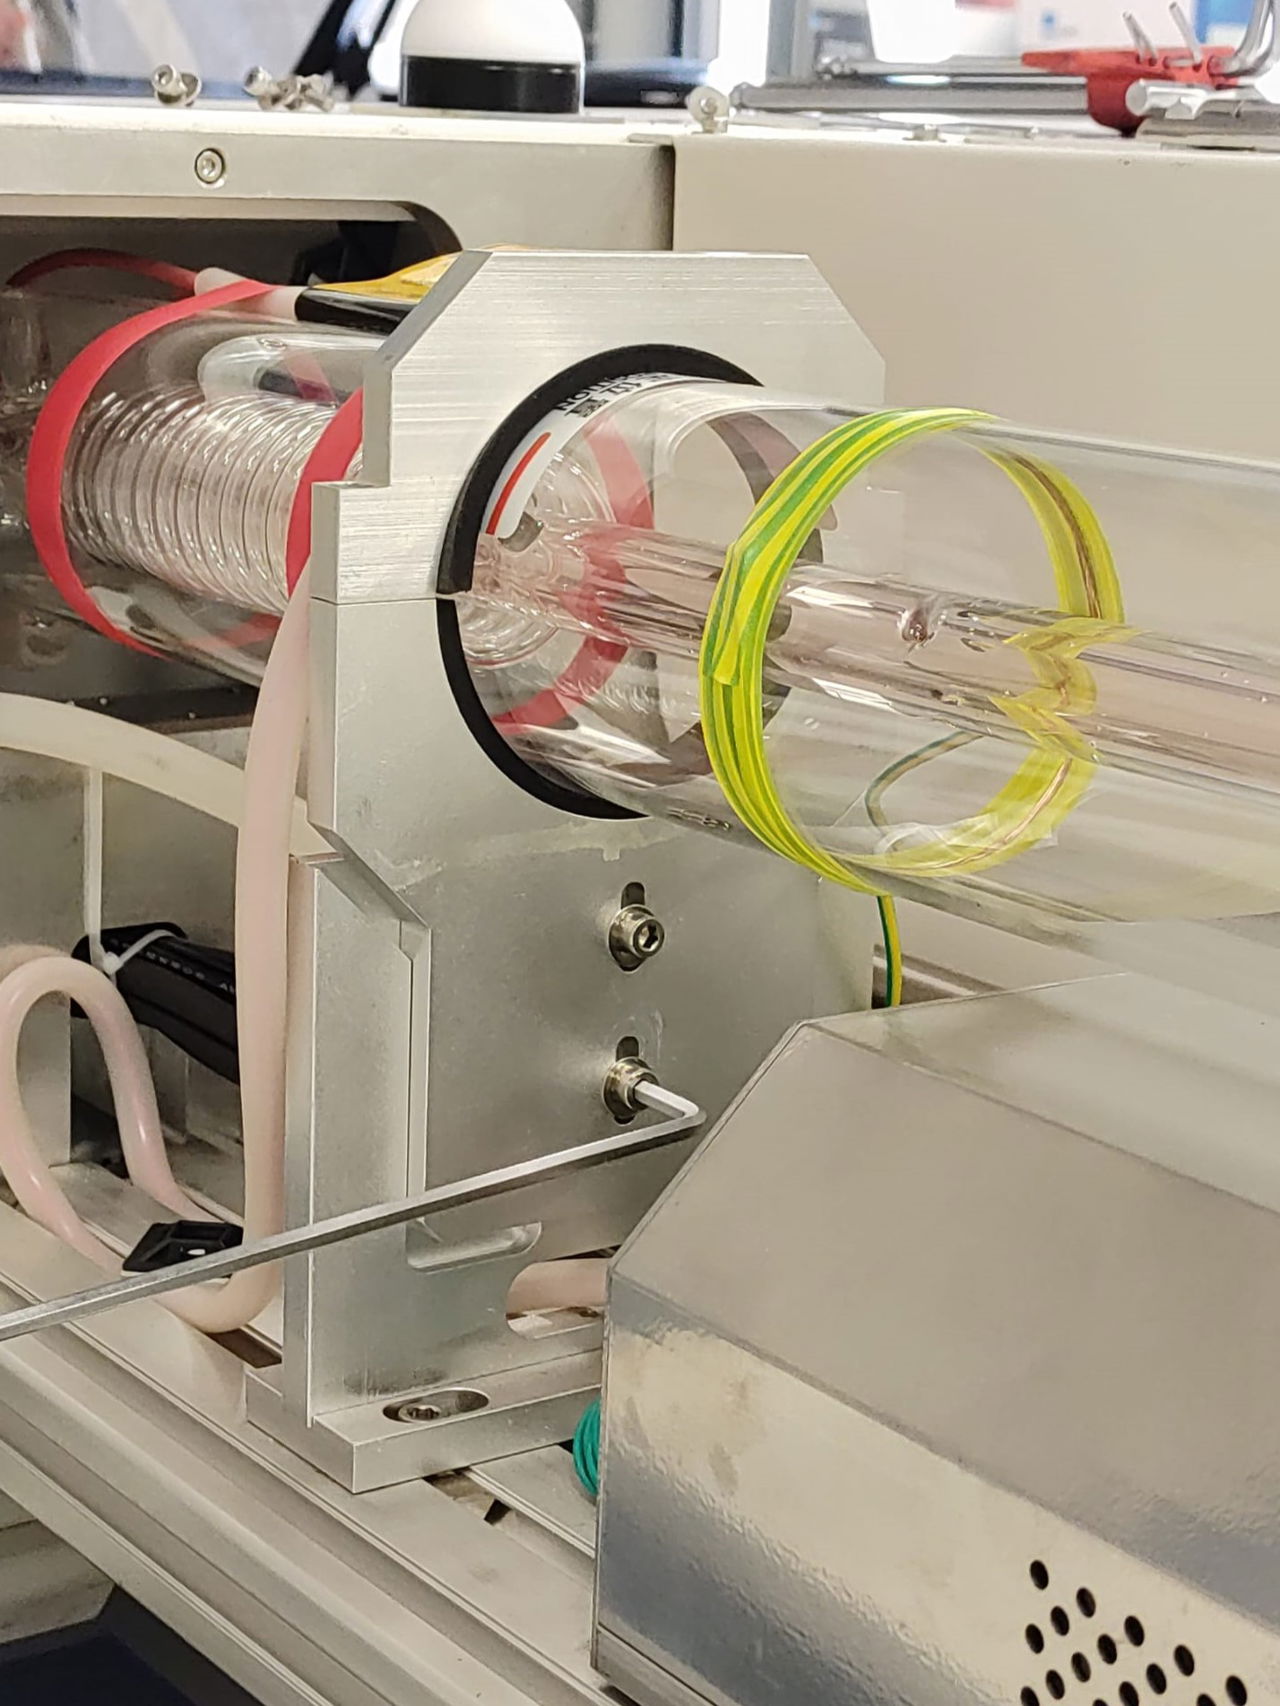
Adjustment basics:
The laser source sits in 2 holders that can be adjusted. Always adjust the holder furthest from the mirrors for more precise control.
Adjustment effects:
- Adjusting source height (up/down): Beam moves left or right on work area
- Adjusting source position (left/right): Beam moves forward or backward on work area
Adjustment procedure:
- Make small adjustments to the laser source holder
- Repeat the plus test at the laser head
- Continue until pulse is centered on the plus sign
- Verify entire mirror alignment once more to ensure everything is still properly aligned
After alignment
Section titled “After alignment”Once alignment is complete:
- Reassemble all components (lens shaft, covers, panels)
- Run a test job to verify cutting performance across the work area
- Document the date for your maintenance records
Need help?
Section titled “Need help?”If you experience difficulties with alignment or results are still poor after alignment, submit a ticket for technical support.